Welcome to the RRR December Blog Hop.
If you arrived here from Jeanne’s awesome blog, you are on the right track. If not, why not head back to the RRR Blog and start from the beginning so you don’t miss any of the terrific projects.
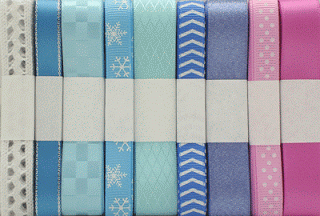
This month the Really Reasonable Ribbon Monthly Ribbon Club Assortment is a frosty winter themed assortment and one of my all time favorites!! I just love all the fun color assortment. Isn’t it awesome??!
Don’t forget that Really Reasonable Ribbon offers Gift Subscriptions in 3, 6, or 12 month options. What a perfect gift for a crafty friend. The first assortment comes with a gift card with your special message enclosed.
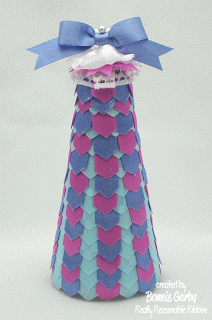
This month I used several of the ribbons from the December assortment to create this non-traditional color Christmas tree. I love the way it turned out. I’ll be sharing a tutorial below.
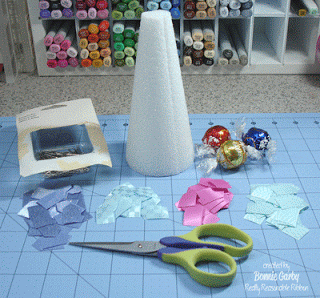
The first thing I did was cut 36 pieces of each of the 4 solid color 5/8″ ribbons. I cut a point on one end and then cut the piece to measure 1″ from the point to the other edge. I used closer to 50-ish pieces of each color, but that will vary depending on how far apart you place your rows. I think if I tried to make another tree exactly the same, I would probably not use the same amount of pieces, so cut some to start and then add more when you run out.
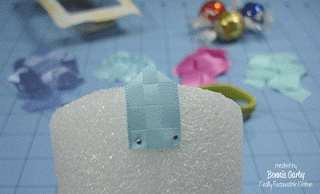
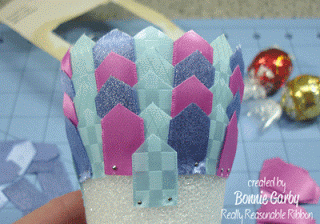
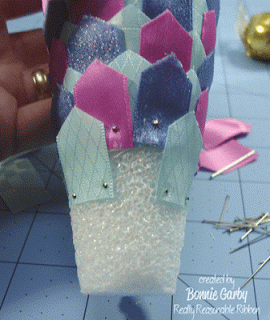
Attach one piece at the bottom of the cone. I started with the light blue checkerboard ribbon. I let the point extend over the edge because you don’t want any Styrofoam to show along the bottom edge.
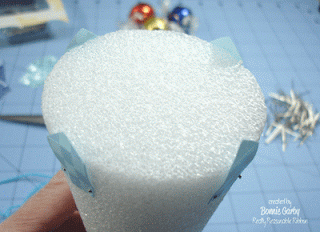
Then add a piece of the same ribbon to the opposite side and then half way between each of those. Take care to have these initial pieces spaced as evenly as possible. These are the most important pieces and will set the stage for the entire project. I used a piece of string to measure the distance between the pieces and adjusted as necessary. This in the only part you have to do that for. The rest of the way you can just eyeball it.
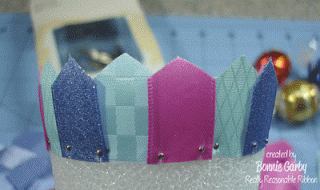
Then you will add 4 pieces of the mineral ice diamond satin in between each of the light blue pieces. Then come in with the rose bloom double faced satin and the iris shimmer satin and fill in all the gaps.
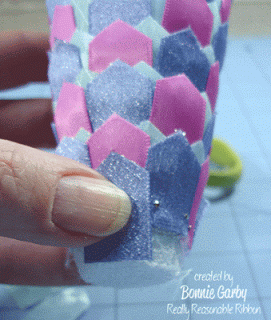
I staggered my colors as I built the columns for added visual interest. I kind of like it that way, but you could certainly do columns of all the same ribbon too. I also think a tree of one solid color ribbon would be beautiful. I’m picturing a tree in my head using all White Glitz Ribbon that would be gorgeous!! But now I’m getting off topic……….
(Time for a Lindor break. BTW – Did you know that a serving size for truffles is 3? That’s important information to know while crafting in December!)
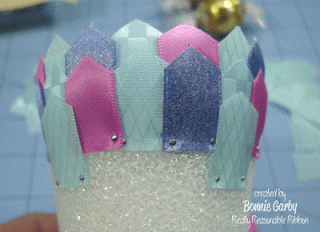
Continue adding rows of alternating ribbon.
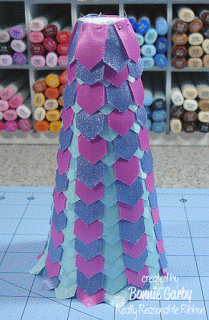
When I got to the last row, I eliminated the light blue and mineral ice ribbons because they would have been totally covered up anyway.
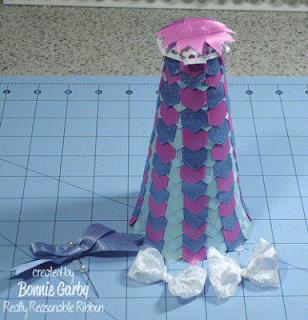
And there you have it……. Now for the tree topper.
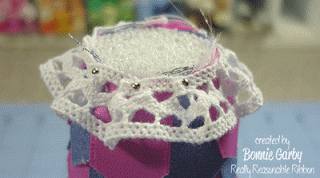
Now it’s time for my confession. I started this with no plan what-so-ever. I wasn’t even sure it would work and now here I am and I have no idea what to do with the top!
Then I cut some ribbon spikes about an inch and a half long and pinned them to the top.
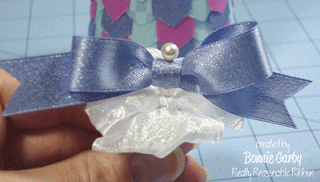
I then made two bows with white silky crush ribbon and cut off the tails, tied a nice bow with the iris shimmer satin and stacked it all on a big corsage pin with a pearl head. There is also a small plastic pearl between the white loops and the iris bow. Then insert the pin down through the center of the tree top. Done!
And here is the finished piece.
I would love for you to leave a comment before you go.




Totally CUTE!! That is a LOT of cutting little pieces! What patience you have! I just love this Bonnie – thank you for sharing the tutorial! (SO love this month's assortment!)
WOWZEERS !! What a lot of work !! It turned out pretty awesome !
beautiful tree
I love the tree and colors
Bonnie, this is beautiful! Love the lace trim & bows at the top!
what a great idea that would work for just about any occassion.
stamping sue
https://stampingsueinconnecticut.blogspot.com/
Such a sweet idea!
I love this! Such a great idea! TFS
What an awesome project. You must be much more patient than I am lol. I'd never get all those points cut straight. It's a festive addition to your holiday decor : ) I couldn't help but notice all your markers in the background. All I can say is wow girl….that's quite a stash! This is such a great hop…thanks for the great ribbon selection to work with! Huggs Ginny
once again, a stunning project that is all about ribbon!!! you are da bomb! – vivian
Oh wow that is such a cute idea! Love it!
Ooh, a tutorial, I love learning how to make new things, and this is one I am going make. What a great idea and you did a beautiful job on the project as well as explaining it, easy to understand. Thanks
What?!!! Oh my! I remember making these with just fance pins and sequins ages ago. This is an update on that and so beautiful. But, man are your fingers numb????
What a gorgeous tree. Thanks for the tutorial.
What an amazing tutorial, Bonnie. Thanks for sharing this. It's quite obvious why you are a DT member for RRR. I am so inspired by all the talent, and I thank you for sharing your talents with us. I SO enjoyed this hop.
Blessings,
Karen
this is absolutely gorgeous. I love the iris effect. thans for the tut too. you can even leave it out after Christmas and call it your winter tree.
Beautiful. I am loving the non-traditional colors.
Such a cute ribbon tree.. and love the bows on top of it..
Beautiful. Thanks for sharing the instructions.
Very pretty tree!