Hi everyone. It’s time for another fun challenge over at the Really Reasonable Ribbon’s Ramblings Blog and this time the theme is ‘Anything Goes & Ribbon’.
So, if you are finding any crafty time at all this close to Christmas, head on over and link your project up!
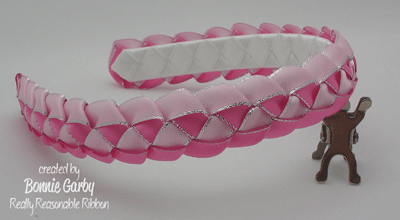
For this challenge, I’ve created a Pretty Pink Headband. I’ve combined the two techniques I’ve shown you in video tutorials in the past to make this headband that any little girl will fall in love with.
The new pretty silver edged double-faced satin gives it a little extra bling.

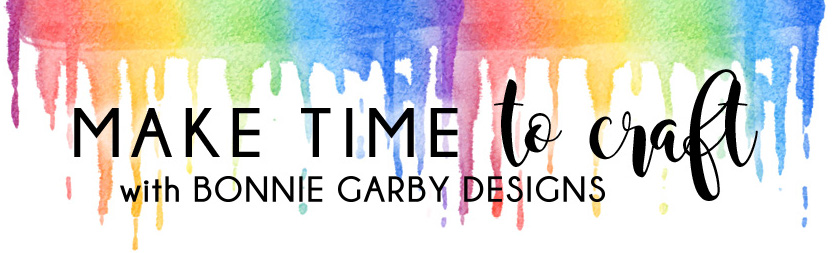
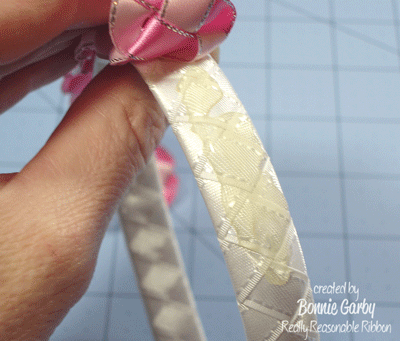
To make the headband I started with 3/8″ White Satin with Grosgrain Edge Ribbon and made a woven ribbon headband as shown in the video below. I used a 1/2″ White Plastic Headband and two 60″ pieces of ribbon which I glued together in an x-pattern in the middle.
Now, you can also just wrap the headband with ribbon, but I think the woven ribbon headband gives it a really nice finished look. Now I realize you can’t see this when it’s worn, but if you are making them to sell or to give as a gift, it’s just a little extra zing and once you get the hang of making woven ribbon headbands, you can make one in 10 minutes or less, so I say ‘Go for it’!
Here is my finished white woven ribbon headband that will serve as the base for my project. This would actually be very nice as is for a First Communion outfit or even for a flower girl………
The delicate stitching on the Satin with Grosgrain Edge White Ribbon gives it a little something extra, right?
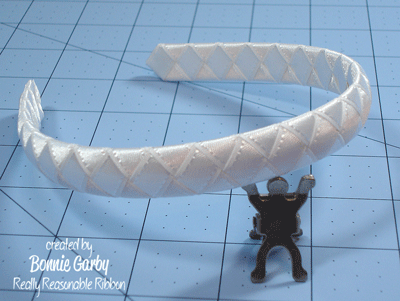
Next I made the military braid with 3/8″ Satin with Silver Metallic Edge in Pearl Pink, and Hot Pink. This beautiful ribbon is available in 20 fun colors and works well for so many projects. You’ll use about 60″ of each color, but to be safe, be sure you start with at least 2-yards of each. For this project there is no need to cut off a certain length of ribbon. Just work from whatever length you have. That way there will be minimal waste. Follow the direction in the video below and stop when you have the length you need to cover your headband from tip to tip. There is a little give in the braid, so you can stop when you are a smidge short and stretch it to fit.
Here is my finished braid

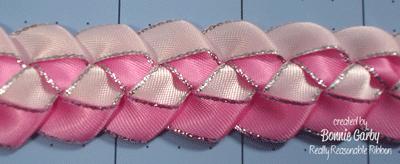
Now I marked the center of the underside of the braid and the center of the top of the headband with a small pencil mark so I start right in the middle.

Thanks for stopping by today. I hope you’ll join in our ‘Anything Goes’ Challenge #62 over at the Really Reasonable Ribbon’s Ramblings Blog. The challenge is open though 12/29 and one random participant will be selected to win a $10 gift certificate to Really Reasonable Ribbon.
Happy Holidays!
~ Bonnie ~

Love the silver metallic edge on this ribbon!
I love the two pinks together! The braid is fabulous!! This is something that I could try :0) I will check out the tutorials…because I love that braid!!
Hugs!!
Heather