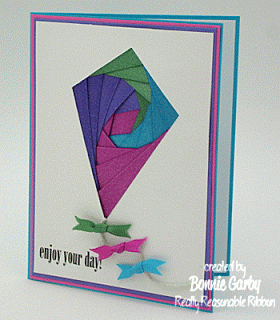
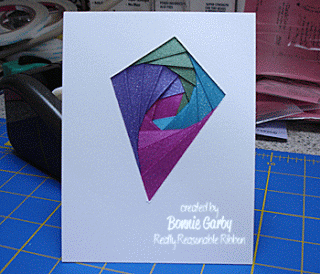
Today I have a quick tutorial for you for an Iris Folding project using ribbon from Really Reasonable Ribbon. This is an easy project and a great way to use up some shorter lengths of ribbon.
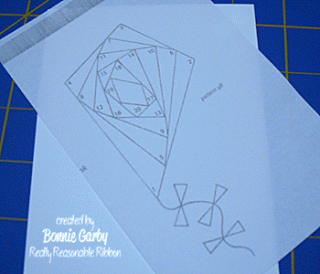
My pattern came from the book Iris Folding Compendium by Maruscha Gaasenbeek and Tine Beauveser. I think this book is currently out of print, but there are lots of great Iris Folding pattern books out there. Honestly, once you understand how it works, you can even make your own patters for basic shapes. This technique is traditionally done with folded papers, but using ribbon is actually faster and I think it looks better.
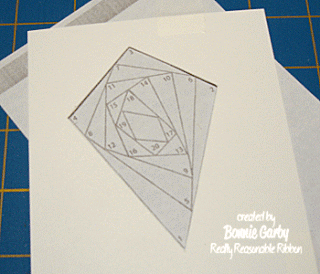
1. Print out two copies of your pattern. Tape one copy in the postion you want to your paper. Keep in mind that you will end up with a mirror image of this shape. Cut around the outside edge with a craft knife.
2. Tape the pattern to the underside of your cut out.
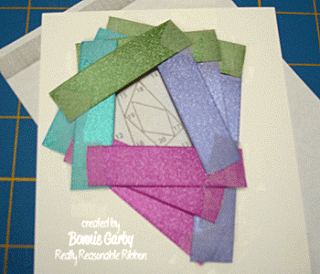
3. Begin adding ribbon pieces on top of the pattern in numerical order. For this pattern I’m using 4 colors and the order (1) garden rose, (2) delphinium, (3) sage, (4) turquoise. Cut ribbon lengths just long enough to cover the entire pattern piece and tape each end to secure. If you are using a ribbon with a right and wrong side, you will place the ribbon right side down. I’m using Shimmer Satin Ribbon which does not have a right and wrong side.
4. Keep going until you completely cover the pattern. Then make sure the ribbon is secure and add additional tape if necessary. Remove the pattern piece and turn your piece over and there is the finished piece. Pretty cool, huh!
To finish the card off, I added a little kite sting made from white Hemp Cording and the tails are 1/4″ Grosgrain Ribbon tied in a knot with the ends trimmed in a v-shape. I adhered the hemp cording using 1/8″ Scor-Tape that I twisted into a thin rope. I pressed it onto the card in the shape I wanted and then pressed the cording to the tape. You can adhere the narrowest ribbons and trim like this with no visible adhesive. The kite tails are adhered using Mini Glue Dots. I then added a rub on sentiment and layered it on a few different colors of cardstock to correspond with the ribbon colors I used. This is the finished card.

