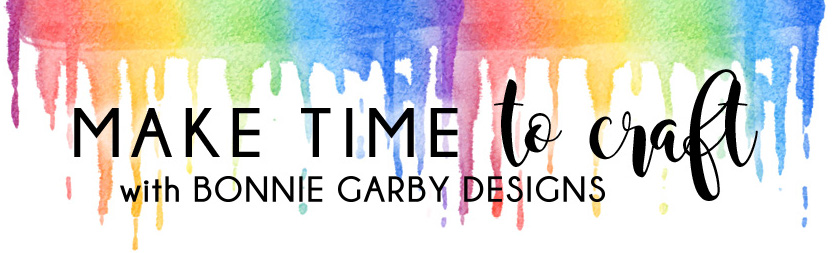
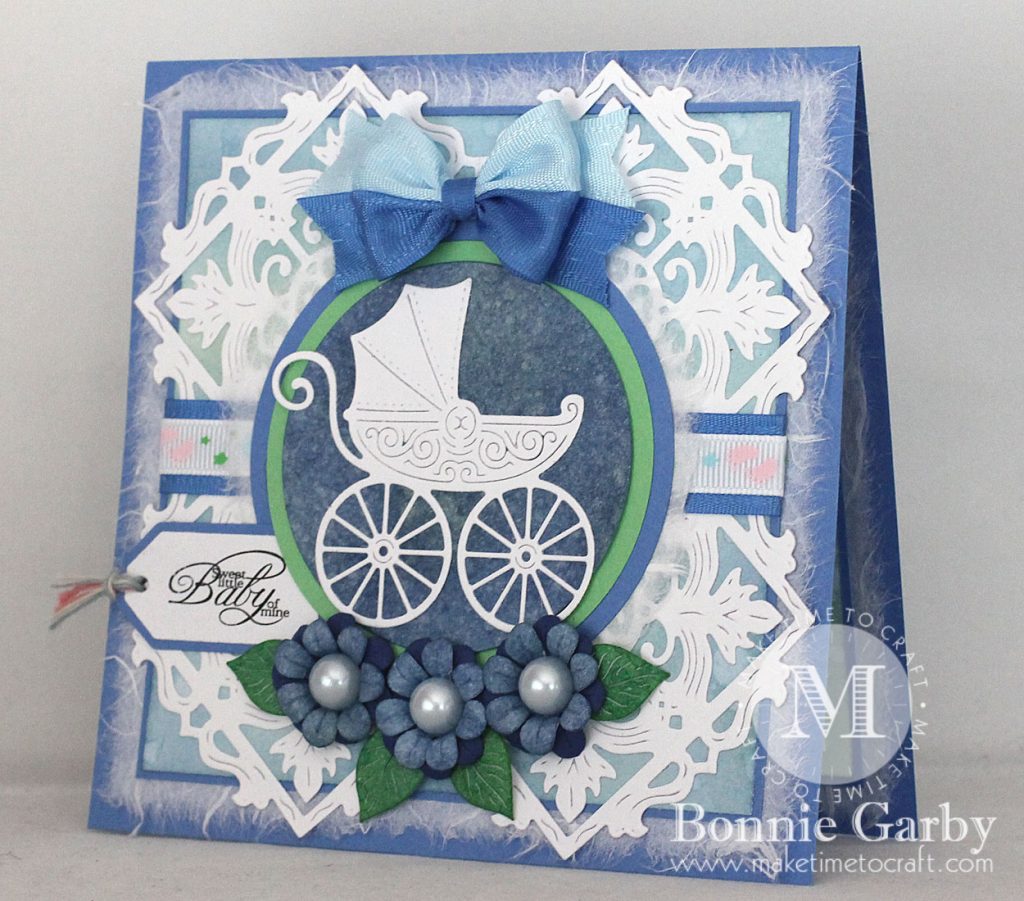
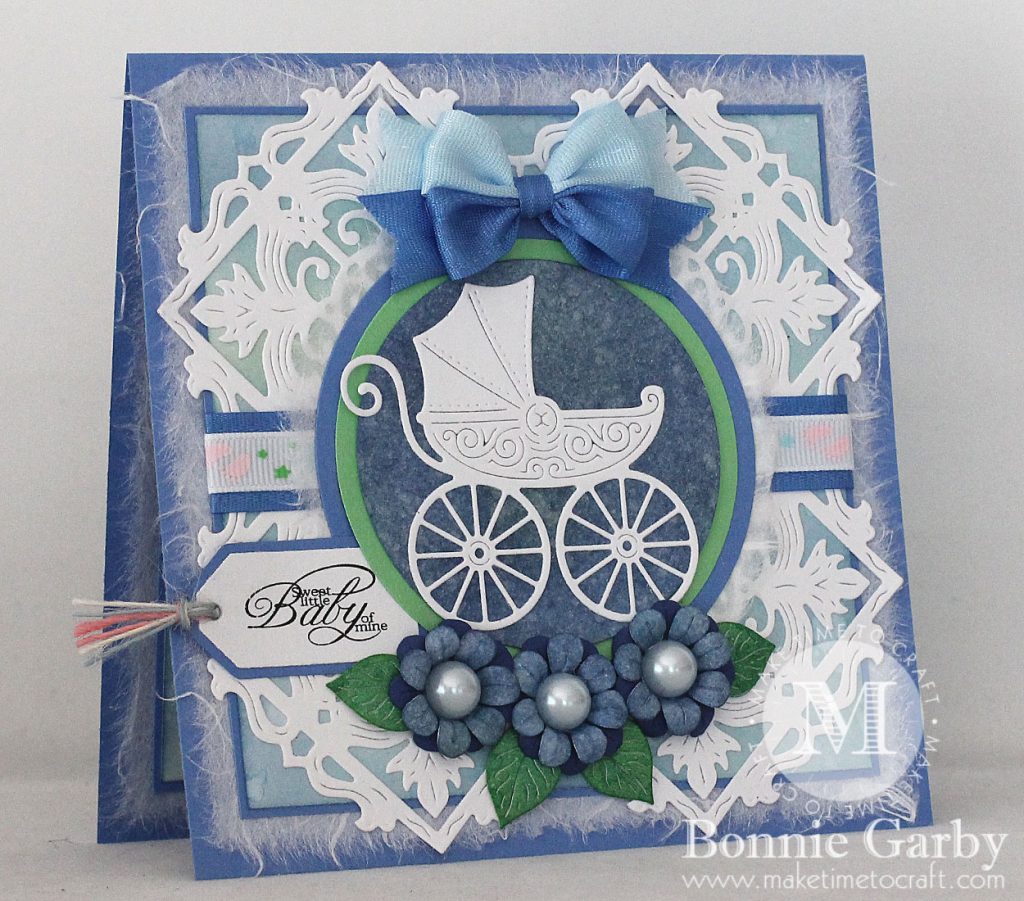
Hi friends. Today I have a pretty card for a baby boy featuring some of the new dies from the Cheery Lynn Designs Vintage collection.
This is one of those cards that I just couldn’t get right. Honestly it almost ended up in the garbage, but I decided to share anyway. Now I’m not saying it’s a disaster, but it just needs ‘something’ and I couldn’t pinpoint what. And I really did try. You have no idea how hard I tried! I think it’s a color thing, but I could not resolve it to my satisfaction….
Anyway, I went with it anyway mainly because I love the background I created with the new Vintage Tile die and I wanted to show you how I did it. I will be using this technique again for sure.
Cheery Lynn Dies used:
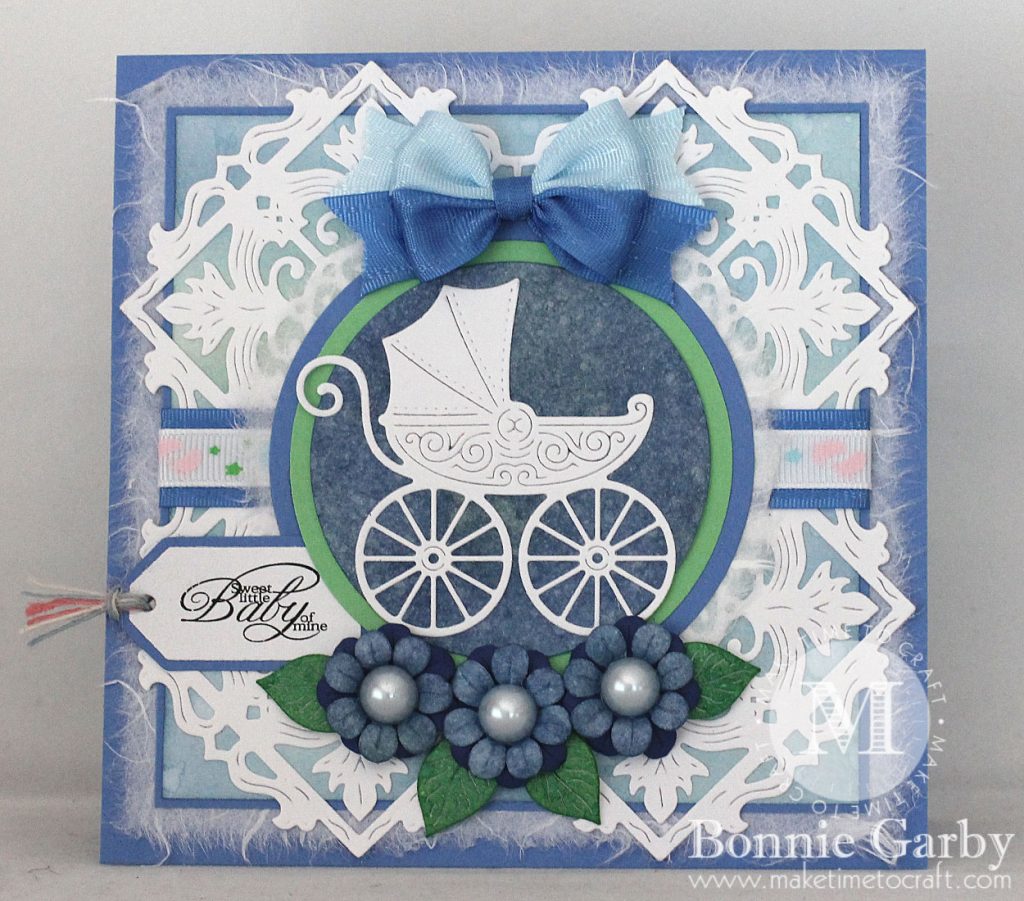
B898 Baby Pram
B777 Floral Bouquet kit
XM4 Circle
CASO20 Nesting Doll Circle Shapes
CABD-109 Nesting Doll Tags #1
B777 Floral Bouquet kit
XM4 Circle
CASO20 Nesting Doll Circle Shapes
CABD-109 Nesting Doll Tags #1
The flowers were cut, shaped and assembled using pieces from the Floral Bouquet kit and the flower centers are 10mm Flat Back Pearls. The flowers were added to the card under the pram medallion.
I topped my card off with a pretty bi-color bow created on my Bow-it-All V3.0 Tool using Blue Topaz and Royal Blue 5/8″ Delicate Stitched Satin Ribbon from Really Reasonable Ribbon. There is also a piece of Royal Blue Ribbon topped with Baby Feet Multi Grosgrain Ribbon running across the center of the card under the pram.
For a video tutorial on how I made this beautiful bow, please click HERE.
For the card background I created with the Vintage Tile die, I cut four tile pieces out of white cardstock that was backed with Stick It adhesive for ease of adhering it to the card.

Take two pieces and overlap them as shown above matching the center points on the sides. I do this on a cutting mat so it’s easy to have everything properly aligned. I have used low tack tape to hold the pieces.
Then I used my acrylic ruler and rotary cutter and cut right through the middle to they will align perfectly.
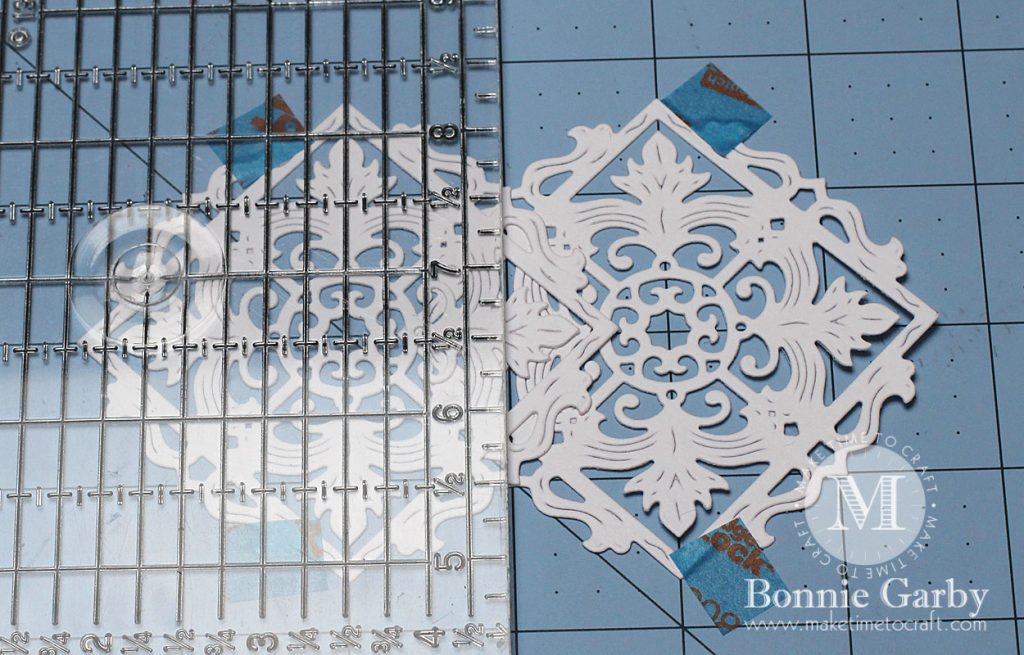
I used some of the quick drying Designer Dries Clear glue and glued the edges together and then I did this again with the other two pieces.
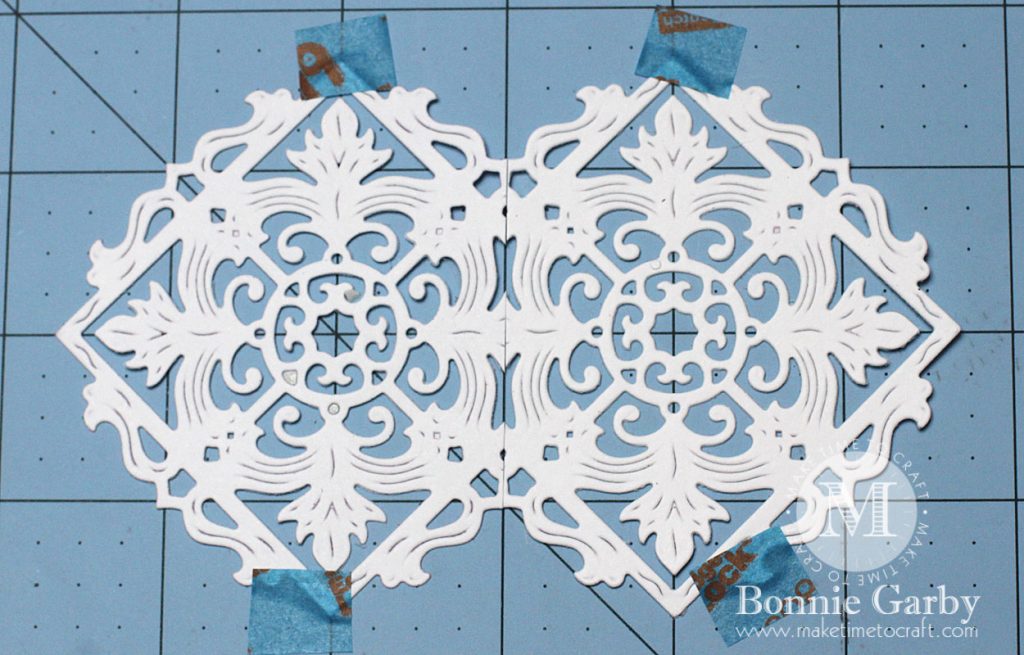
Then take the two groups of two pieces and align the same way matching the center points on the sides. Align your ruler through the middle again and cut.
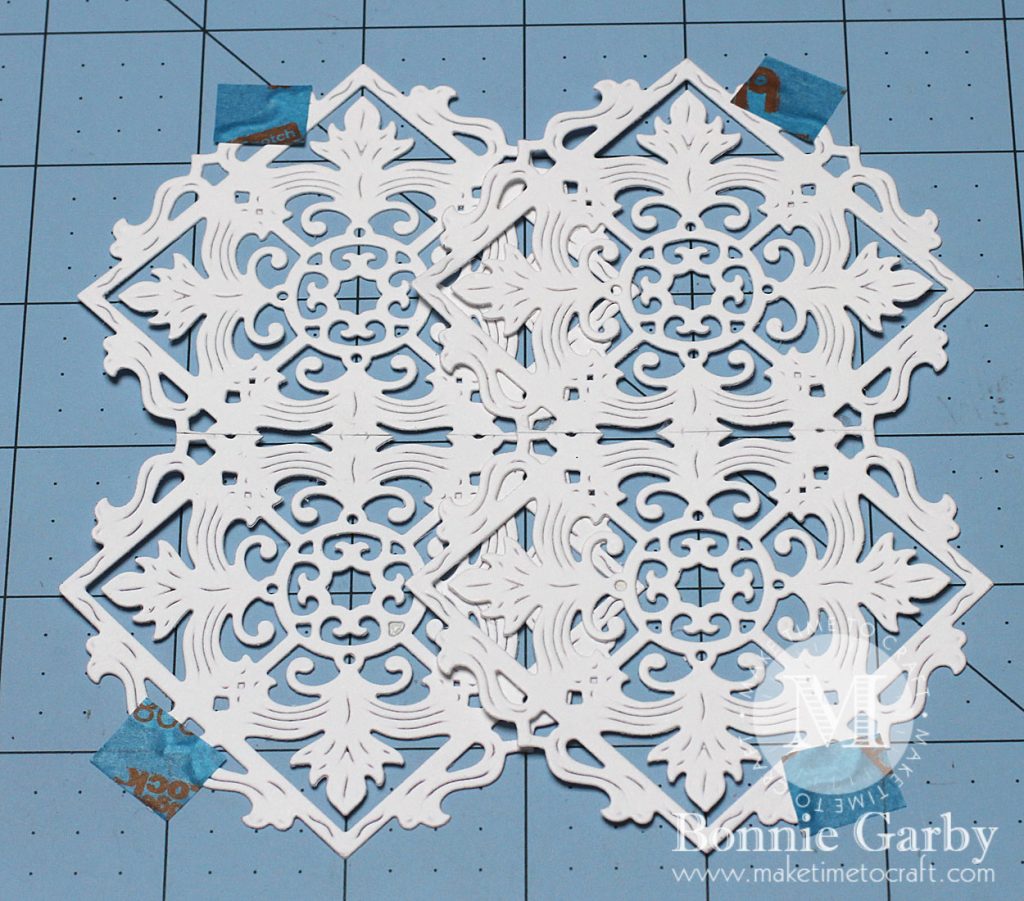
This will give you a large background perfect for a 5-1/2″ square card. I love to find different ways to use my dies to stretch their functionality. This makes it easier for me to justify my purchase.
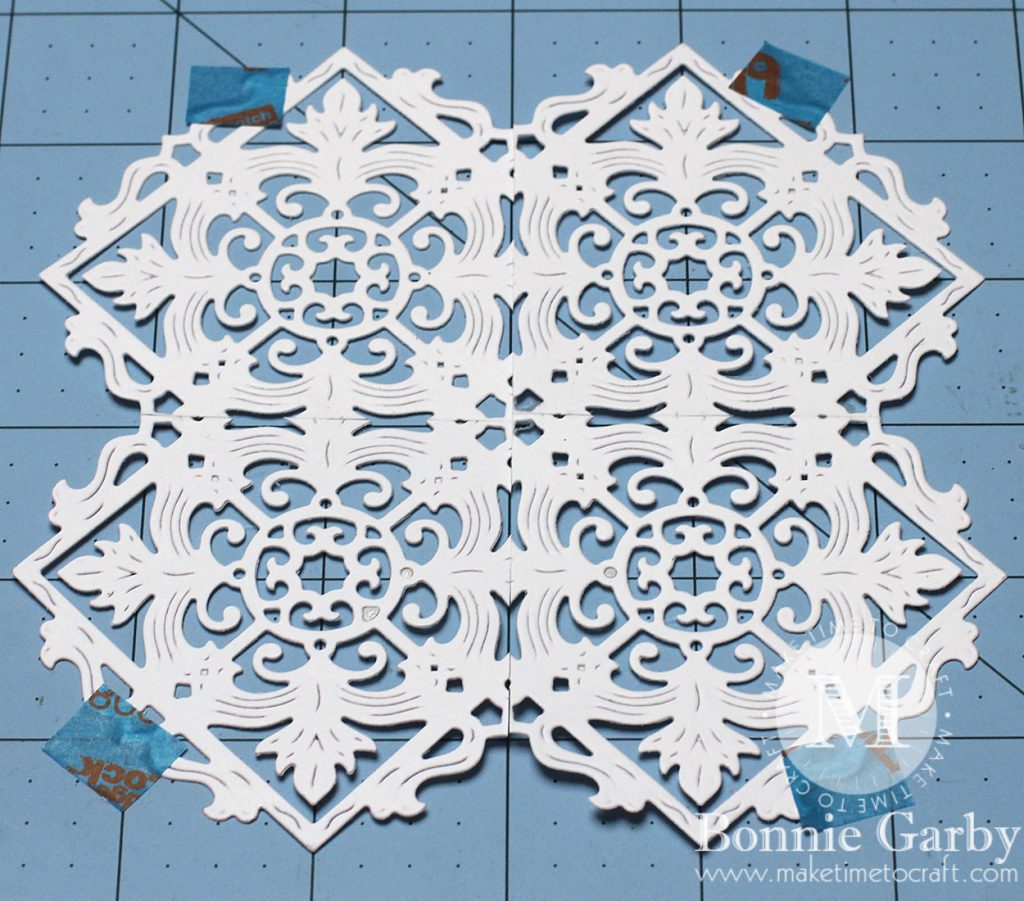
As you can see, it’s not perfect, but since it’s not my main focal point (at least not the center of it), nobody will ever know.
I’m entering my card in the following challenges:
613 Avenue Create #200 – Anything Goes
Word Art Wednesday #296/297 – Anything Goes
Dies R Us #79 – Anything Goes with Dies
TTCRD – Anything Goes
Tuesday Throwdown #356 – Anything Goes
Crafting from the Heart #172 – Anything Goes
Jo’s Scrap Shack FFC #201 – Anything Goes
Crafty Friends #64 – Anything Goes
I’m entering my card in the following challenges:613 Avenue Create #200 – Anything Goes
Word Art Wednesday #296/297 – Anything Goes
Dies R Us #79 – Anything Goes with Dies
TTCRD – Anything Goes
Tuesday Throwdown #356 – Anything Goes
Crafting from the Heart #172 – Anything Goes
Jo’s Scrap Shack FFC #201 – Anything Goes
Crafty Friends #64 – Anything Goes
Supplies:
Ribbon: Really Reasonable Ribbon
Dies: Cheery Lynn Designs (see list and links above)
Digital Stamp: Create with TLC
Ribbon: Really Reasonable Ribbon
Dies: Cheery Lynn Designs (see list and links above)
Digital Stamp: Create with TLC
Bow-it-All V3.0
Zutter 9-in-1 Tool
Adhesives: Stick It Adhesive Sheets , Scotch Advanced Tape Glider
 , Designer Dries Clear Adhesive
 , E6000
Half Pearls
Inks: Distress Ink in blues and greens
White Mulberry Paper
Zutter 9-in-1 Tool
Adhesives: Stick It Adhesive Sheets
Half Pearls
Inks: Distress Ink in blues and greens
White Mulberry Paper